Pale watercolor paper can turn gray in a photo. A patch of light can wipe out the brushwork on an oil painting. Neither means you need a new camera.
A useful artwork photograph lets someone see what you see when you stand in front of the piece. Even light and a straight view get you much of the way there. Then a few closer shots can show the things a flat image misses: a raised edge of paint, the grain of the paper, the depth of a canvas.
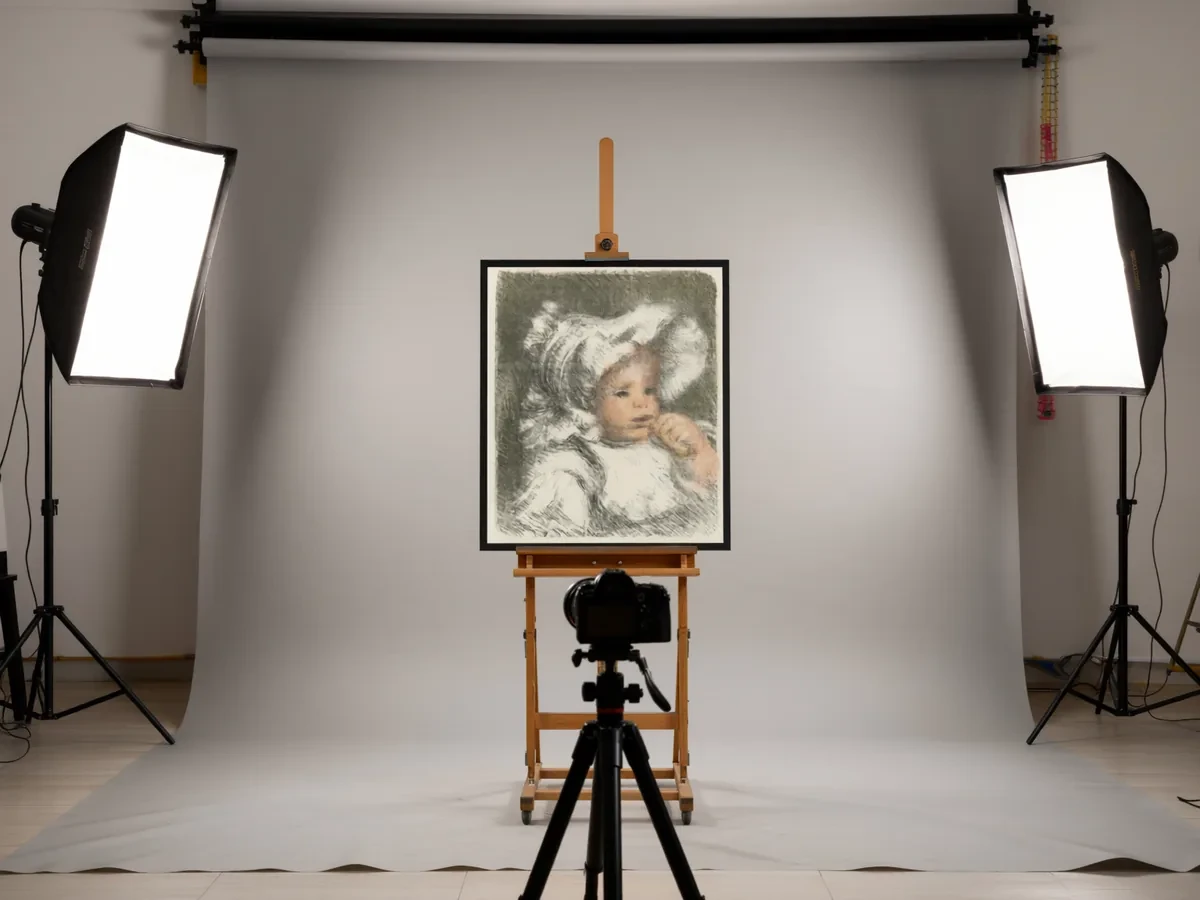 Frameit AI Create
Original artwork: Pierre-Auguste Renoir
Take one test photo before buying equipment
Start with your phone’s main camera, soft indirect window light and something stable to hold the phone. Turn off the room lights, clean the lens and photograph one artwork. Examine the center and all four corners at full size.
| What you see | First thing to try | Why it helps |
|---|---|---|
| One side is brighter | Change the artwork’s position relative to the light | Uneven illumination is difficult to correct without changing the painting |
| A pale patch hides the brushwork | Move the light and check the reflection again | More exposure adjustment cannot recover detail hidden by glare |
| Top edge is narrower than bottom | Make the camera parallel to the artwork | You can preserve more detail with less perspective correction |
| Everything looks slightly soft | Stabilize the phone and use a timer | This helps separate camera movement from a focus problem |
| Paper looks orange or blue | Use one type of light and check white balance | Mixed light can give different parts of the piece different color casts |
A neutral gray card is useful for repeatable color. White printer paper can help spot a gross color cast, but its tint and brighteners make it an unreliable calibration reference. Once the test photo looks right, keep the setup fixed for the rest of the collection.
Get the window-light photo right first
Suppose you are selling a small watercolor. Set it near a window, turn off the warm ceiling light and take one photograph. If one side of the paper is white and the other gray, adjust the work’s angle to the window. If direct sun creates a bright patch, move out of it. Look for even light across the sheet before judging the painted colors.
Oil paintings need another look for reflections. From the camera’s position, move the light or artwork until you can see the brushwork. If a framed piece can safely be removed from its glazing, photographing it without the glass may help. Darkening a photograph afterwards cannot recover color hidden by glare.
If you regularly photograph a collection, two matching diffused lights are worth considering. Start with one on either side at about 45 degrees and adjust from there. Once the first photograph works, keep the lighting and camera settings for the next pieces.
Take a separate texture photograph with light coming low from one side. It can reveal paper grain and raised paint that the evenly lit front view misses. Both photographs earn their place in the listing.
Straight edges begin with where you stand
If the top of a rectangular painting looks narrower than the bottom, the camera is viewing it at an angle. Moving the lens to the height of the painting’s center, and keeping the phone parallel to the surface, usually makes the difference obvious.
A grid helps you see the tilt. Leave a little space around the edges so there is room to straighten and crop later. A steady support and a timer are useful when the photo is soft, particularly in dimmer light. Getting closer is not always the answer: a very wide lens close to the work can exaggerate its shape.
A little perspective correction goes a long way
Frameit’s Scan is handy when you want to take the photo and prepare it for framing in the same app. The camera grid helps with alignment, and Album lets you bring in a photo you already prefer.
After capture, Rectify marks the artwork’s corners. A quick look at those four points is worth taking: a pale paper edge can be easy to miss, and you may want to keep the paper border around a drawing. The points can be moved before the corrected image opens in the framing editor.
This is a good finishing step for a slightly skewed photograph. A bright reflection or a blurred signature is a reason to return to the camera; straightening the rectangle won’t bring those details back.
For that watercolor, place the points at the outer paper corners if the white border belongs in the finished image. If you only need the painted area, select that boundary instead. Decide which edges matter before confirming the correction.
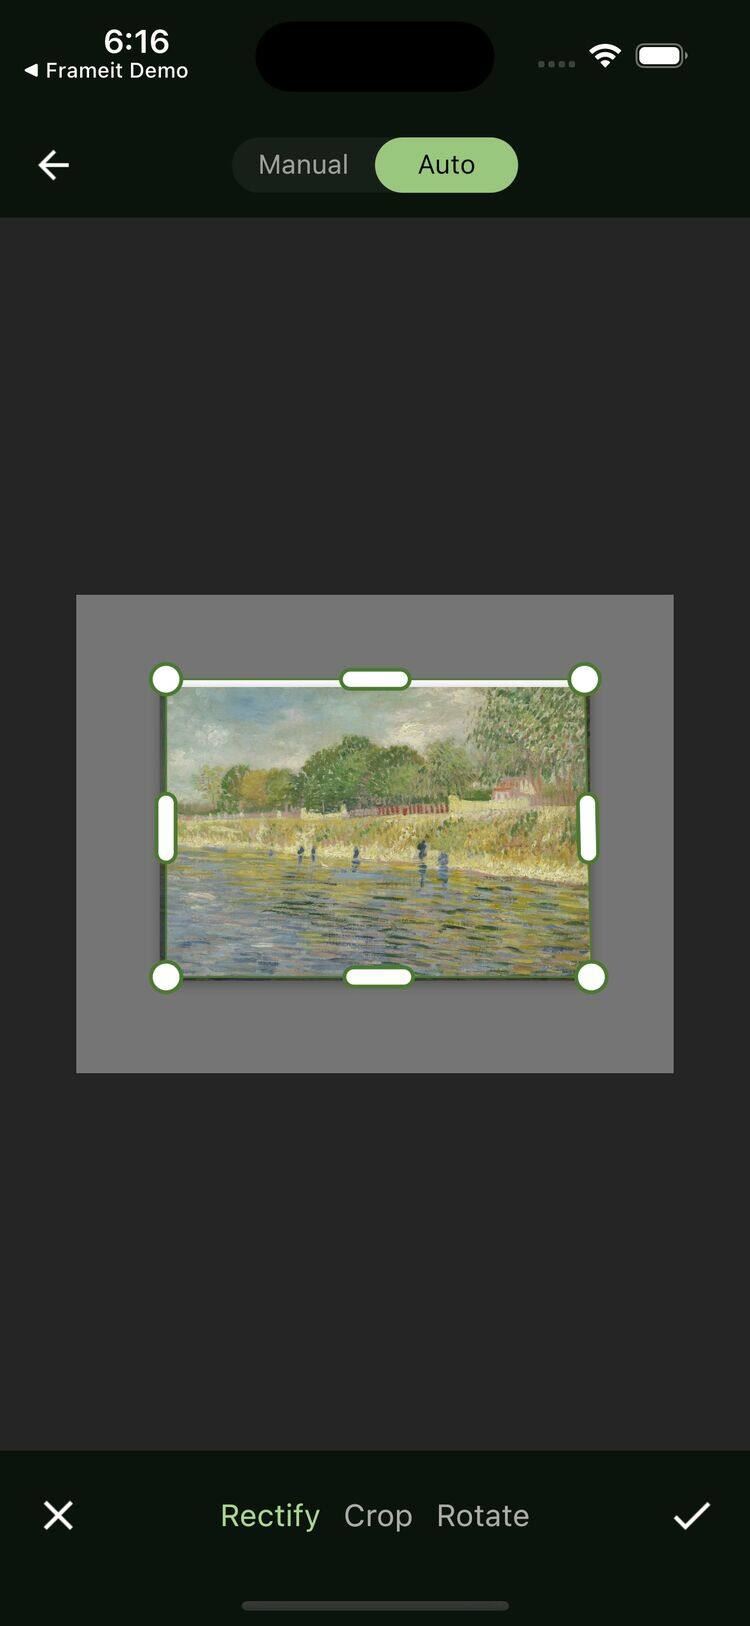 Frameit Editor
Set the camera once the light is settled
On a phone, turn off flash, filters and portrait blur. Tap the artwork to focus, then enlarge the photograph to inspect it. Where your camera app allows it, locking exposure and white balance helps keep a collection consistent.
With a separate camera, start with a low ISO, a steady support and an aperture that keeps the corners sharp. Keep the RAW file for small white-balance corrections. The right settings depend on the lens, light and size of the work; the edges of your first test photograph tell you more than a fixed recipe.
These controls belong to your camera or phone’s camera app. You can bring the finished photograph into Frameit through Album.
Keep the color you saw in the studio
A little editing may be needed to bring the photograph back toward the original. White balance is often the first useful adjustment: a warm bulb or a blue window reflection can change the whole sheet of paper.
With the original beside you in neutral light, compare the pale areas as well as the strongest colors. Increasing contrast can make the image look lively while quietly removing the soft marks that matter. Keep a full-resolution master, then make the smaller copies needed for your listing images.
For prints, the usable pixel dimensions matter too. At 300 PPI, a 4000-pixel-wide file gives a print about 13 inches wide. Flat work that can safely lie on a scanner may be better captured with a scan.
The photo set buyers expect
For each artwork, plan these shots:
- Main image: the artwork alone, cropped to its edges, in true color.
- With margin: the artwork with some wall around it, so an original reads as a physical object.
- Three-quarter view: shows canvas depth and whether the edges are painted.
- Details: two or three close-ups of texture, brushwork and the signature.
- Back and labels: for originals, the back, the hanging hardware and any certificate.
- In a room: a framed preview on a wall so buyers can judge size and style.
The last shot is the hardest to stage, because it needs a finished frame and a room that suits the artwork. A framed preview made from your photo fills that gap.
Give the photograph somewhere to hang
Once the photograph looks faithful, it is interesting to see it in a different setting. A small watercolor above a writing desk tells you something a tightly cropped image cannot: how it might become part of a room.
That is a useful place for Frameit AI Studio. Your artwork photo can become a room preview from a chosen style or a short description. A frame change or a quieter wall may be all it needs. The AI Studio article shows what those choices look like.
Keep the straight-on photograph and the real texture details beside the preview. They let someone enjoy the proposed setting while still seeing the work they would receive.